Did some more machining to finish this little sub-project. Turned some stainless pegs for the spring to hook behind
Drilled some holes and started polishing, one at a time, not too bright, it should match the shine of the levers. I like my aluminium to still look like polished aluminium instead of chrome.
Finished product, including specials springs, bolts, castle nuts and splitpins.
mounted to the RSC90, even though I'm planning to make different ones for this bike later on, but for now it's an upgrade. Special chrome adjuster nuts were already on the cables.
And now there done and I should get back to building the C110 racer, so I can ride it this season.
But when I do another day of casting I might just make another set of these to be machined for another bike, or anyone who is interested.
This casting "thing" is getting funny. Copied me a set of the CL72 perches that I now have on my RSC90, but then with solid mirror mounts, so they can be removed without leaving a trace.
making the space for the lever
just enough, it fits
we're getting there, mirror mounts removed and contour shaped to look like the originals that were a bit less rounded. Then drilled the holes for the handlebar.
but still some machining to do before they will be ready for fitting. cutting the opening in the clamp, making the hole for the adjuster, threading it and making a slot for the cable. Making the pegs that the spring hooks behind, probably from stainless, and fitting them. Making the holes for the leverbolts, 7mm on top and 6mm bottom without threads for the special bolts. A lot of work for a couple of perches, but they will be different from all the other ones in the paddock.
Today I finished mounting my newly cast footpegs and pedals. Replica RS125 footpegs with Replica CR110 brake and shift pedal mounted to the brackets I made earlier, also had to make a new shifter connecting rod because my pedals are further back now and higher. So the next thing will be to make a higher paddockstand as the old one is too low now. (or I might just steel it from the SS50 racer which is momentarily parked behind the sofa)
just some sanding, beadblasting and polishing to do, to really finish it, but I'm really happy with the results so far.
I compared my new CR31 to the CR29 I was running on my S90. They both seem to be made in the same casting, so lucky for me, I won't have to go looking for another intake rubber that will fit, I can use the type I have and just order some extra. Here are some pics of the carbs side by side: (the 29 is the "dirty" one)
funny how they both have the tickler on the same side, but the cables on opposite sides, probably for some specific purpose.
just arrived from Germany today: a couple of brand new Keihin CR31's
I already had the resin velocity stack, but I put it in the picture anyway, because I took it out to see if it would fit these carbs. Also very odd is the velocity stack with flange to fit an air filter, never seen one of those before. Tomorrow I will compare to my CR29.
I changed the brake and clutch levers to Original stuff.
the old ones (not even Honda, but they have the cool ribbed levers and no mirror mounts): (old pic, back then still with alloy top plate)
the new ones, original Honda as used on the racebikes with the springs and big adjusters: Okay, they have mirror mounts, but according to my CR110 parts list, there wasn't even a different part number for the ones without mounts.
Made the cables with original NOS grey cables, thin 6mm with special endcaps made to fit the adjusters that are made for 7mm cables. Thinner cables save weight :P and it just looks better on a small displacement bike. After this I started getting all the pieces together for the rear brake cable, will probably finish it tomorrow.
Decided on using the replica CR110 brake and shift lever, but the pegs that go with it, are just too wide and would cost me too much ground clearance. Therefor I was looking for some footpegs with a classic look, not the CNC knurled modern stuff. For now I've decided on a set of cast alloy pillion pegs from any modern Honda, but turned on the lathe to remove the hinge part. I know the method too turn them looks bit odd, but it actually worked pretty well.
Okay, they aren't RSC replicas, but it looks a lot more classic then all the CNC milled stuff out there
The RSC90 will receive a CR110 brake pedal, originally the cable attaches to it by means of a pin that goes thru the pedal and the end of the brake cable which is a flat piece of steel with a hole in it, as can be seen in the picture of this original CR110: This is not a standard available cable part, nor is there a similar cable which could be used as a donor. Therefore today I went to play on the lathe and created a few: Still needs some finishing and I want to experiment in making them thinner, but then they will also go to the zinc plater. When they come back, I can finish the new rear brake cable.
The RSC is on the lift again, this will be the winter that some modifications will be made. I've started on the foot pegs, they are going up for ground clearance. The original CYB pegs were just to low and will be moved to a CB72 project that some day will be built for street use. In the picture can be seen a new bracket made to fit the CB72 alloy plates, temporarily mounted the CR110 brake pedal and then built the brake cable stay and stopper screw fitment.
just needs some grinding to finish it off and then it can go to the zinc-plater.
other planned modifications: - build a new front fender - replace rear hub with original S90 part (CD50 until now) - fix 4speed gearbox and make it close ratio - fit 122cc kit and if possible, fit fairing, build new tank, paint.......and so on
Last weekend I had the RSC90 out to play again. My dad and I entered in a 3-hours event on saturday evening with our co-rider John, this time on his Egli CB750
picture thanx to chalopy A real experience to ride a real Egli, but the bike isn't built for small twisty industrial-park circuits.
I had a look at pictures of the track before and thought it might just be nice for the RSC90, even with it's horrible gearbox ratio's. So I took it out of the corner where it has stood for a year or two, dusted it off and took it with me.
Ralph came to have a Look also and took some really nice pictures.
even an action shot
I had a really nice time with this bike again, dispite the horrible gearbox and lack of ground clearance. I rode the 2 heats without muffler (for the first time) And the bike sounded great, just like small displacement Honda's from back in the days should sound.
again, thanx to Ralph for the movie and putting it on youtube and his own blog even I, who rode the bike wearing ear plugs, can't get enough of this sound, so I don't want to keep it from you followers.
Done a little bit of work for my S90 in between all the other projects. The plan is to build another engine, bored and stroked to 122cc by using ATC110 parts, cylinder, crankshaft and head. Only the ATC110 head has separate valve seats which are pretty thin, which means there is not enough material in them to install a bigger inlet valve. A while ago I recieved a head from someone, probably C90, that had a full cast in combustion chamber, much easier to put a larger valve in there, but this head didn't fit the ATC110 cilinder. I had to machine the space for the top of the cilinder, and also the studbolt hole where the oil comes up, as the ATC110 has a large rubber collar there and the C90 head didn't have a space for it.
ATC head on the left, C90 on the right.
the valve I plan on using compared to the original S90 inlet valve
when made to fit the head, this motor will breathe a little easier.
Stew Ross sent me some pictures of his 90. He's made some more progress, really like that pinstripe on the tank, makes me think about getting this tankshape for my RSC90, even though I was planning to make something like the later model tanks.
The 100cc motor I've been runnning this season has the tendency to overheat after a few laps, So even though I like the empty looks of the frame, I will be fitting an oilcooler for next season. To look at the options, I started drilling into an original headcover, it had a broken fin anyway, so nothing was lost. But it turned out pretty well, I have my oilcooler hookup now. The top oil line runs up because that was where the broken fin was.
I think the new motor wil really like this, as it has a topend based on the ATC110 with cast steel cilinder, something I want to put together over the winter, you can see what it will look like mounted on the empty motor here: this will become a 122cc motor with CT110 crank and 56mm piston.
okay, it has been some time ago, and there have been events since then, but this is what happened at Veenendaal this year. Picture thanx to Lea langezaal As can be seen, I have a groundclearance issue.
And then this is what happens:
Emergency repairs so I could start the next heat.
more can be read at Ralph's blog, he came to see what I was doing with the engine he donated to my project. Also a nice video of me just before the start.
By the way, I plan to build different, higher, footpegs for next season, a little less original, but I need the groundclearance. I'll make it look like honda made them by using the right parts.
I had some problems with the ignitioncoil I used on the S90, it was an old CB72 coil but when it was replaced with a different type, my S90 ran better.
I really did want an original CB72 coil, as they were used n RSC90's back in the 60's and it looks good, so I had to test the coils that we have.
My SS50 was the answer:
I found out which of the 5 coils were good and now have an original CB72 coil on my S90 again.
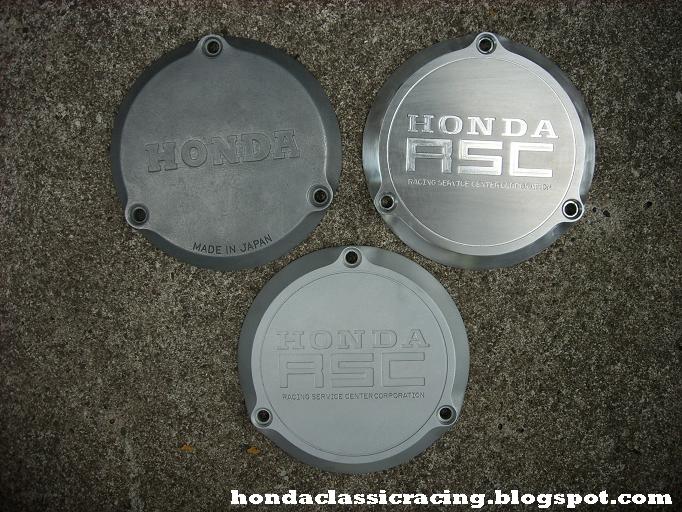
Look what came in recently. Specially made in england by a great guy called Colin Marley. Original next to CNC milled, I glassbeadblasted mine to match the rest of my engine, and for some extra cooling surface. Here is what that looks like when mounted, sorry about the fuzzy picture. Some of these will go to Australia (you know who you are) but I haven't figured out the shipping yet. There is one extra if someone would be interested.
Yesterday we had a race in Nunspeet, I had a lot of trouble getting the RSC running correctly, fiddeling with main jets, but at the end of the day I found the right one. All the symptoms directed me to a bigger jetsize, but smaller was the answer. I did have a lot of issues with the gearbox though, after the clutch exploded, the gearselector arm was bent. Pictures can be found thru the Nunspeet bike club website (click "classic race") What do you know, If you click the 2nd link, the first thing you see is me.... picture thanx to: www.naomischolten.nl More great photo's can be found on her website.
My dad rode his CB50 with 75cc engine, also having gearbox trouble, first time an original honda 5speed doesn't work the way it should, they are normally pretty indestructible.
My RSC engine was opened up today to fix the gears and it seems to work a little bit better now. So the RSC is allready on the trailer again for races tomorrow in Varsseveld. I didn't want to ride the 250 or 500 there, so we got my CB50 out and put it back together again, as some parts were "lent" to other bikes. I hope tomorrow all goes well, the 90 gearbox should show improvement and the 50 has an experimental camshaft setup.
The trick to timing your cam the way you want to: Extra holes. In fact this isn't my camshaft I'm now using, it is Ralph's But we now have it timed for more power at higher revs. It was probably made for dirt-track or motocross, probably even for ATC's where you would like to have power in low revs, but for roadracing this could be cranked up to about 11.000 RPM. I don't want to go much over that, just because of reliability and gearbox limitations.
The third event for the RSC90, it was repaired just in time after the clutch thing. Carb was temporarily replaced with a CB100 part that we knew was working, also the coil was replaced. These were the parts that were doubtfull, so we eliminated them. A shot in the paddock: You can see the CB100 carb mounted on an original manifold. After the training we put in a bigger main jet, it ran pretty well, but the plug was a bit light. Just one round in the first heat told me that was wrong, I came in, we tried to change the needle position in the hope we could get some progress and I could back on the track for the remainder of the heat, but the clip fell off the needle in the grass.....damn. But at least we knew now that the bike could run good, and the problem had probably been the coil. So we put the CR29 back on for the second heat, and it ran pretty well, needle and main jet being allmost right.
Also note the alloy top crown plate from my CR110 replica forks, this was to get less pre-tension on the front forks, a step forward to good handling. close-up:
A shot from the paddock:
Me in action, must have been the second heat, as you can see the CR29 mounted. picture thanx to Lea our club photographer. more pictures of the event can be seen here